Citrus Engine: Design levels with Flash Pro - part 1
January 17th, 2013
Citrus Engine supports several game level editors, one of them is Flash Pro authoring tool (Flash Pro CS5, Flash Pro CS6, etc.).
Download sample files
Try sample
Flash Pro is a great tool for positioning elements on stage and the way it works is pretty simple:
- Get Components.fla, which includes all the basic components needed to design levels (README details)
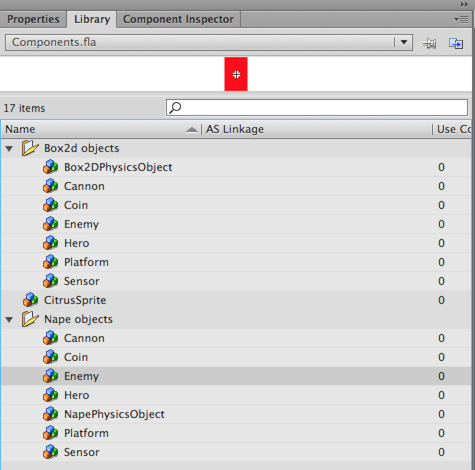
- Duplicate Components.fla to your project folder and rename it to for instance Level1.fla
- Open Level1.fla in Flash Pro and start designing your level
- Place some of the components on stage (blue is an instance of Hero, green = Sensor, grey = platform)
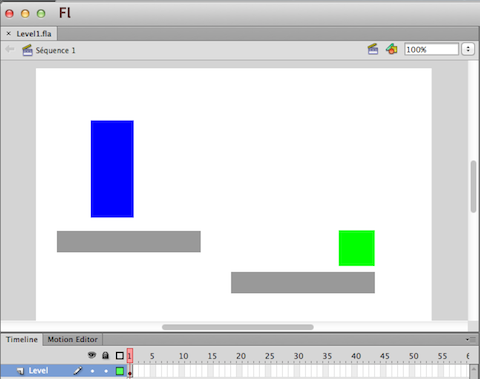
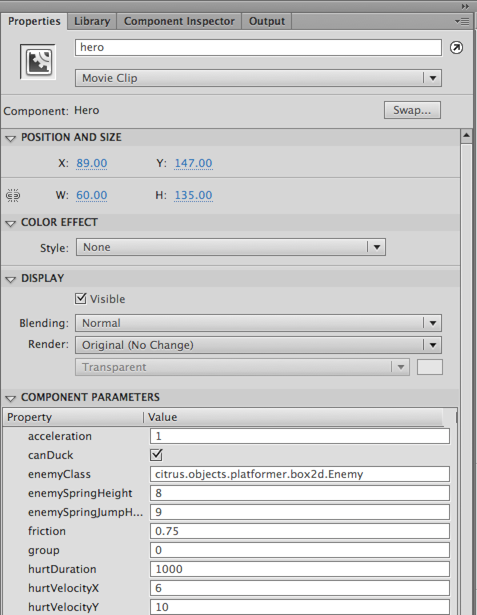
- Now you can define the look and feel for each of the objects on stage using Properties panel. I’ve defined the view parameter, which will basically load and include an image on stage. It can be also an animation. You can define and change all these parameters manually later on in the code.
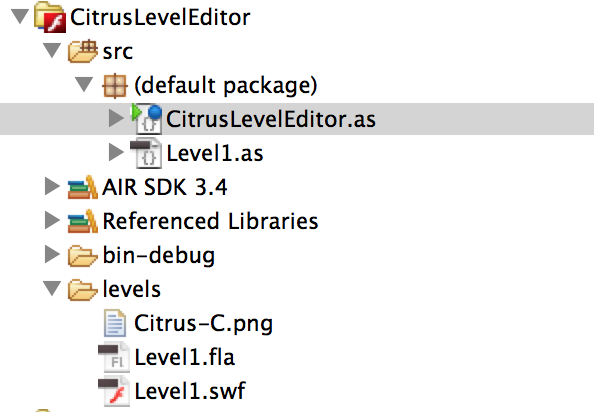
- Create a new Flash Builder ActionScript Project, create a folder called levels and copy your Level1.fla there. The folder structure should look like this. Let’s add some code and Level1 Class in the next steps.
- In Project -> Properties -> ActionScript Build Path add Citrus SWC library (e.g. CEV3-1-1-Starling-Box2D.swc)
- In the main class, load Level1.swf and initialize our through Level1 class that we create. The main class needs to extend StarlingCitrusEngine.
import citrus.core.starling.StarlingCitrusEngine;

[SWF(frameRate="60",width="1024",height="768")]
public class CitrusLevelEditor extends StarlingCitrusEngine
{
	public function CitrusLevelEditor()
	{
		setUpStarling(true);

		var loader:Loader = new Loader();
		loader.contentLoaderInfo.addEventListener(Event.COMPLETE, _levelLoaded);
		loader.load(new URLRequest("../levels/Level1.swf"));
	}
	private function _levelLoaded(evt:Event):void {
		state = new Level1(evt.target.loader.content);

		evt.target.removeEventListener(Event.COMPLETE, _levelLoaded);
		evt.target.loader.unloadAndStop();
	}
}
- Create a new class called Level1 that extends StarlingState. Map level to a variable, set objectsUsed, this will just import necessary classes that we use in our game. Create physics and add them to level. Using ObjectMaker2D create the level from a MovieClip that we loaded (Level1.swf).
import flash.display.MovieClip;
import citrus.core.starling.StarlingState;
import citrus.objects.platformer.box2d.Hero;
import citrus.objects.platformer.box2d.Platform;
import citrus.objects.platformer.box2d.Sensor;
import citrus.physics.box2d.Box2D;
import citrus.utils.objectmakers.ObjectMaker2D;

public class Level1 extends StarlingState
{
	protected var level:MovieClip;

	public function Level1(_level:MovieClip)
	{
		super();
		level = _level;
		var objectsUsed:Array = [Hero, Platform, Sensor];
	}

	override public function initialize():void{
		super.initialize()

		var physics:Box2D = new Box2D("physics");
		physics.visible = true;
		add(physics);

		ObjectMaker2D.FromMovieClip(level);
	}
}
- To change the behavior of the hero give the object a name in the Properties panel of Flash Pro. This name should be unique across your level. Use getObjectByName(name:String) function to retrieve any object in your level.

hero = getObjectByName("hero") as Hero;
hero.acceleration = 0.2;
- To register a signal (event) on the sensor
var sensorGate:Sensor = getObjectByName("sensorGate") as Sensor;
sensorGate.onBeginContact.add(sensorGateOnBeginContact);
- Create a function that will be called when hero touches the sensor.
private function sensorGateOnBeginContact(contact:b2PolygonContact):void
{
	trace("Sensor touched");
}
- Also if you open a component, and see the 1st frame, you can predefine some of the default values programatically.
var className = "citrus.objects.platformer.box2d.Enemy";
var params = {
    view: "characters/enemy.swf",
    leftBound: -300
}
In the next part, we will discuss the animations, the parallax and the camera features.
Tune your AIR for iOS development skills: compile, install and profile like a pro
May 31st, 2012
The purpose of this article is to share with you some tips that might help you to speed up and improve the process of building AIR for iOS apps. These are the practices that I use every day and hopefully some of you will find them useful.
Installing an app (*.IPA) on your iOS device
As a developer you want to save time, be able to install apps on your device quickly and see the results. Using iTunes for app install has some drawbacks: you will have to synchronize it and it takes lot of time and you cannot install apps on devices that are not synchronized with your iTunes (like a friend’s iPad).
There are three ways I find quicker + one useful when you have more testers involved:
iPhone Configuration Utility
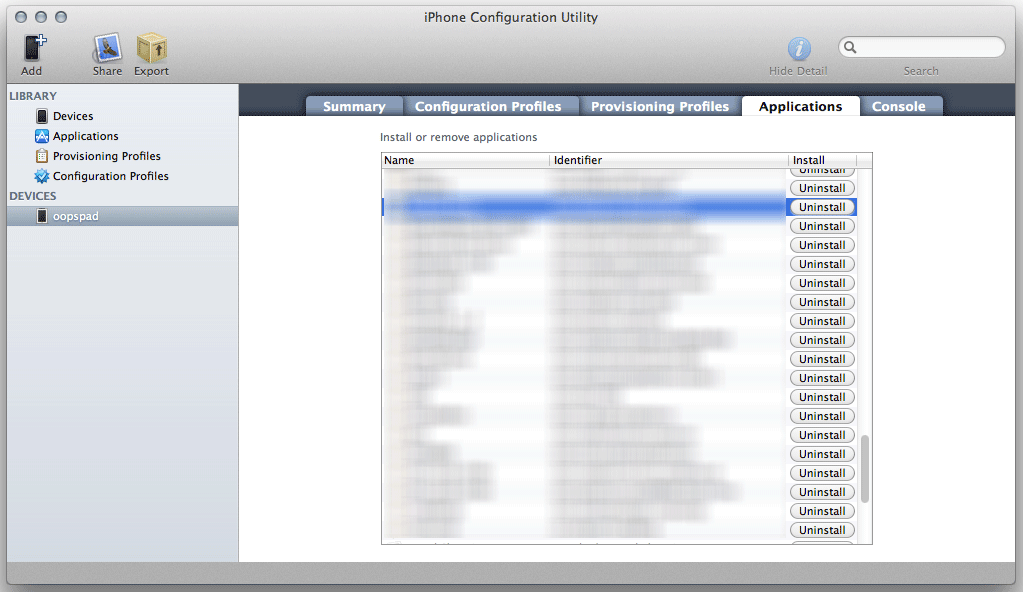
Available for Windows and Mac from Apple, this smart piece of software helps you to manage apps installed on your devices. Drag and drop an IPA file to Applications and then choose a device and install or uninstall specific apps. This works for iPad as well. You can also manage configuration and provisioning profiles.
Download for Windows | Download for Mac
Xcode Organizer
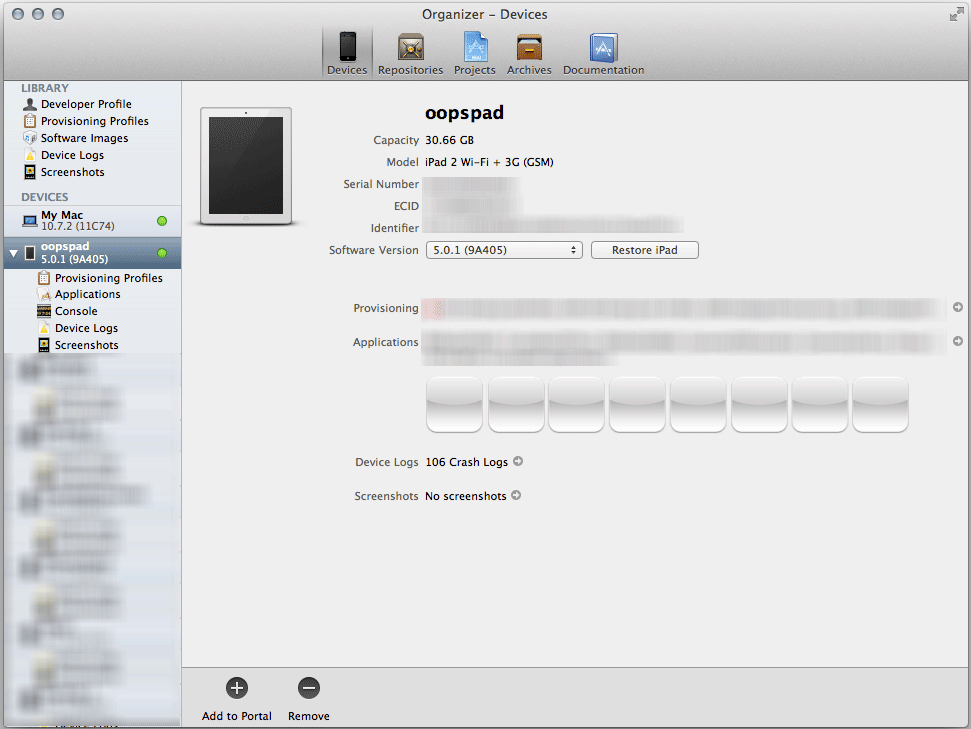
Once you run Xcode, go to Window -> Organizer. There you can see the list of devices you use. Pick the connected one and click the button labeled “Use for development”. Then you can just drag and drop IPA files on the device name on the left side and the app will install.
Command-line install to iOS device
The absolutely fastest method for copying your apps to a device is to use the command-line (Terminal.app on Mac, Command Prompt cmd on Windows). When used together with the command-line compilation, you can greatly automate the overall test deployment of your apps.
Have a look at this article (currently for MacOS only), it works:
How to deploy iOS apps to the iPhone via the command-line
Try combining the above with the compilation process below in a single deploycompile.sh command and you get ultimate and very fast solution for your development process.
TestFlightApp
You can also deploy IPA files to devices over internet. This method is however cumbersome for quick testing by a single developer as you have to always upload an IPA to the TestFlightApp website, but it’s great if you have several or many remote testers, so you don’t have to send the file to each one of them - TestFlightApp covers the testing distribution for you. Check https://testflightapp.com/
Compile with command-line
There are many way to compile your apps. You can go via Flash Builder, that’s probably the easiest way and I use it very often. There are four modes Fast (ipa-test interpreter), Standard (ipa-debug) and Release (ipa-app-store, ipa-ad-hoc).
But sometimes you want to automate things or just compile a SWF file without having the source code, that’s where command-line comes into play and it’s actually very easy to use.
On Mac you can use the Terminal.app on Windows the Command Prompt.
For packaging AIR apps there is ADT package command (see docs)
You can compile your app simply this way:
path/to/sdk/bin/adt -package -target ipa-app-store -provisioning-profile Profile.mobileprovision -storetype pkcs12 -keystore YOUR_IOS_CERTIFICATE.p12 -storepass YOUR_CERTIFICATE_PASSWORD FINAL_APP.ipa APP_DESCRIPTOR.xml TO_BE_COMPILED.swf ADDITIONAL_FOLDERS_OR_ASSETS
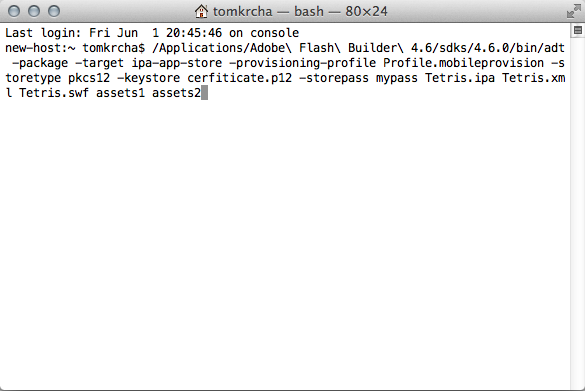
For instance if you have an AIR app named Tetris.swf with a descriptor Tetris.xml, just run this (assuming you are using the SDK from Flash Builder).
/Applications/Adobe\ Flash\ Builder\ 4.6/sdks/4.6.0/bin/adt -package -target ipa-app-store -provisioning-profile Profile.mobileprovision -storetype pkcs12 -keystore cerfiticate.p12 -storepass mypass Tetris.ipa Tetris.xml Tetris.swf
If you will have some assets for the tetris game that you want to load at runtime, just pass the folder name after the *.swf file.
/Applications/Adobe\ Flash\ Builder\ 4.6/sdks/4.6.0/bin/adt -package -target ipa-app-store -provisioning-profile Profile.mobileprovision -storetype pkcs12 -keystore cerfiticate.p12 -storepass mypass Tetris.ipa Tetris.xml Tetris.swf assets1 assets2
You can put the command above in files (*.sh, *.bat). So the above line you put for instance in run-able compile.sh file. You can have commands like compile.sh, install.sh, run.sh, uninstall.sh or even like compileUninstallInstallRun.sh, which makes things even faster and single command does all the job. You can also automate certain things, change version in txt/xml file that you load into your app and so on, these scripts can be also deployed on a server and build automated daily builds from SVN, so many things to play with here.
Profile your app
Profiling is very useful as it allows you to find memory leaks, lower your memory usage and improve the performance for your app. You should do this periodically, not just when you are done with the app.
There are three useful tools for that.
Apple Instruments
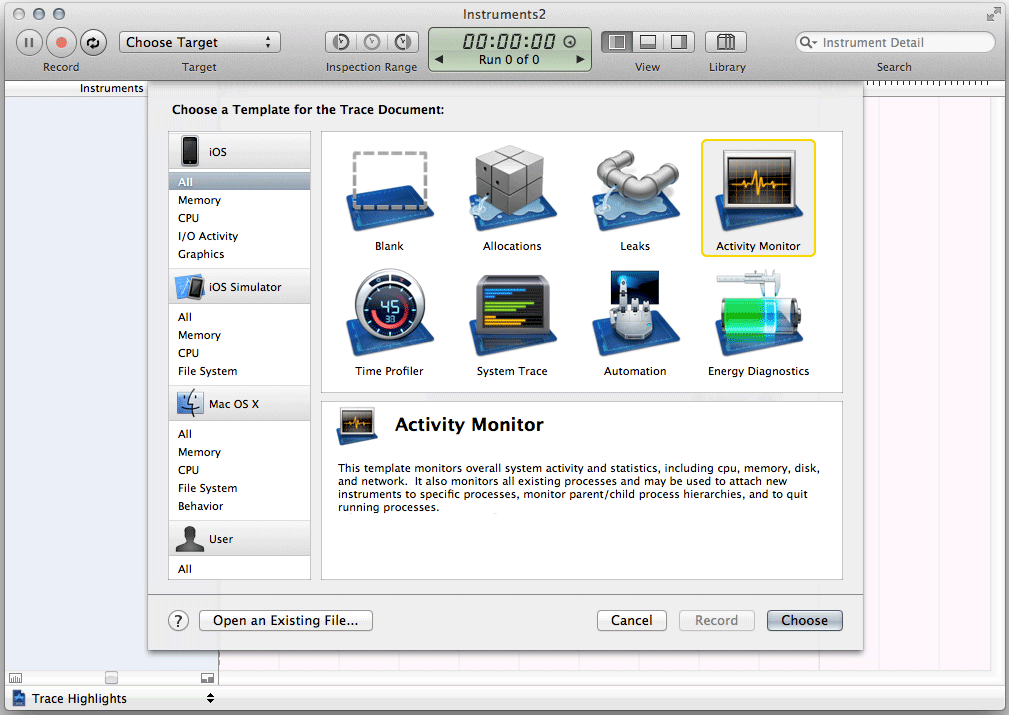
Instruments are part of Xcode development tool from Apple. You can launch it from menu Xcode -> Open Developer Tool -> Instruments. With instruments you can see real FPS, real memory usage, real CPU usage the on device reported by iOS and much more.
Flash Builder Profiler
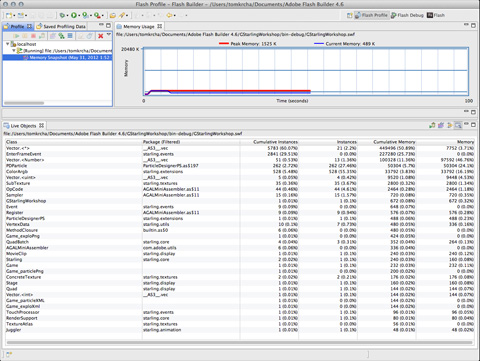
Run your app in profiler (via menu Run->Profile or Profile button) from Flash Builder. You will be able to see what objects are allocated in the memory, how many instances you have and memory leaks (if something grows and it shouldn’t). In side-scroller games you should avoid creating instances during the game play and removing them as the garbage collector will try picking them up, otherwise you might get a choppy experience. For that you have to implement pools and recycle instances.
You can also find loitering objects by comparing two memory snapshots. This will help you to find the objects you forgot to release from the memory.
Tip: Force garbage collection
Sometimes you need to clean-up memory immediately and not wait for GC to collect it automatically, especially when profiling.
With AIR you can actually force GC with the following call:
flash.system.System.gc();
Tip: Postpone garbage collection
This is very useful trick if you want to delay GC. Every garbage collection could lock your UI and glitch overall game experience for a second (or less). You may need to avoid this especially in the kind of games where you need smooth game play.
Check out the following:
flash.system.System.pauseForGCIfCollectionImminent(imminence);
Monocle profiler
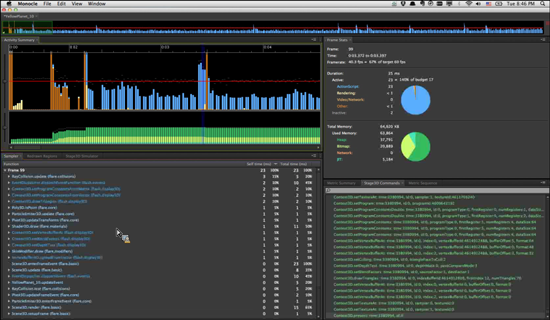
Codename: Monocle is an upcoming profiler by Adobe, which basically allows you to find bottlenecks in your app frame-by-frame and help you resolve performance problems in your apps. Find out what is consuming the most processing time in your app, watch Stage3D rendering step by step and much more. You will hear more about it soon.
iOS Simulator
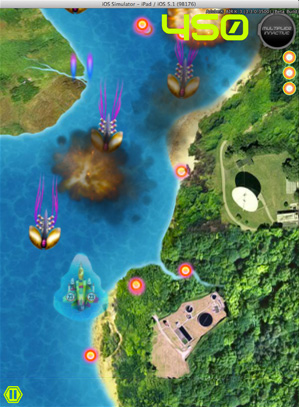
As of AIR 3.3, you can now run your applications in iOS Simulator on MacOS X. iOS Simulator is part of Xcode. It allows you to test your IPA files directly on your Mac. This is very useful for testing native extensions (just don’t forget to compile them for iPhone-x86, not iPhone-ARM).
Check out the new targets ipa-test-interpreter-simulator and ipa-debug-interpreter-simulator, together with -installApp, -launchApp, -uinstallApp switches in the adt command, which is located in AIR 3.3 SDK bin folder.
Using MouseLock, Right Click, Middle Click features in Flash Player 11.2
February 22nd, 2012
Flash Player 11.2 introduces new mouse features designed for game developers in mind, but many other developers can find them useful as well.
Demo
Try this technical demo using the new features, you need Flash Player 11.2 installed (download here).
http://flashrealtime.com/demos/newmousefeatures/

* Double click for fullscreen to enable mouseLock. Try also right click, middle click, click and mouse wheel.
The demo source code is available here: http://flashrealtime.com/demos/newmousefeatures/NewMouseFeatures.as
Mouse Lock
Locks the mouse in the center of the screen, gives you a relative position of the mouse (movementX, movementY), FULLSCREEN mode only. Mouse Lock is very powerful feature especially in first-person-shooter or third-person-shooter games as it allows you to move freely without reaching the screen boundaries.
New API:
- stage.mouseLock
- mouseEvent.movementX
- mouseEvent.movementY
private function startMouseLock():void{
	// go fullscreen
	stage.displayState = StageDisplayState.FULL_SCREEN;

	// activate mouseLock
	stage.mouseLock = true;

	// register event listener
	stage.addEventListener(MouseEvent.MOUSE_MOVE, onMouseMove);

}

protected function onMouseMove(event:MouseEvent):void
{
	if(stage.displayState == StageDisplayState.FULL_SCREEN){
		// movementX and movementY contain mouseLock delta positions
		trace("movementX: "+event.movementX + " - movementY: " + event.movementY);
	}
}
Right Click
Right click allows you to display your own context menu or in terms of first-person-shooter use another weapon or action, like throw a flare. The nice side-effect is that by registering right click on stage, you can get rid of the default “About Flash Player” context menu.
The usage is simple, like with standard CLICK:
// register right click listener
stage.addEventListener(MouseEvent.RIGHT_CLICK, onRightClickNow);
// ...
// the event listener itself
protected function onRightClickNow(event:MouseEvent):void
{
	trace("right click");
}
Middle Click
Same approach as Right Click, just register MouseEvent.MIDDLE_CLICK event.
stage.addEventListener(MouseEvent.MIDDLE_CLICK, onMiddleClick);
Setting up the Flash Builder
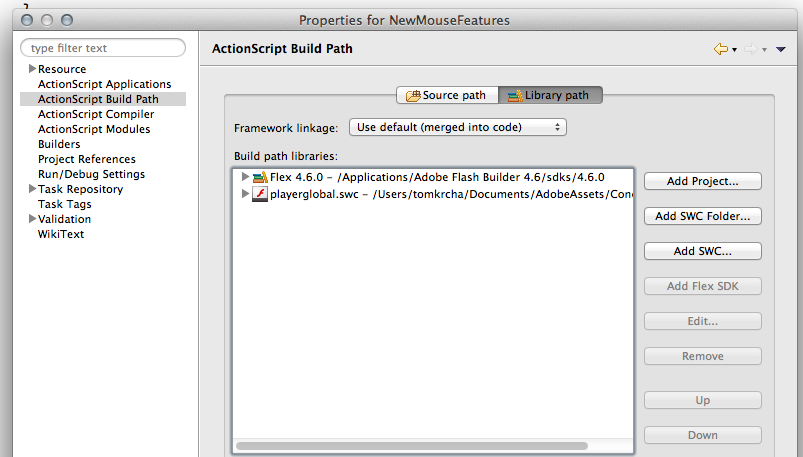
To access the new features you need to link new playerglobal.swc (download here) in you Flash Builder project. See screenshot:
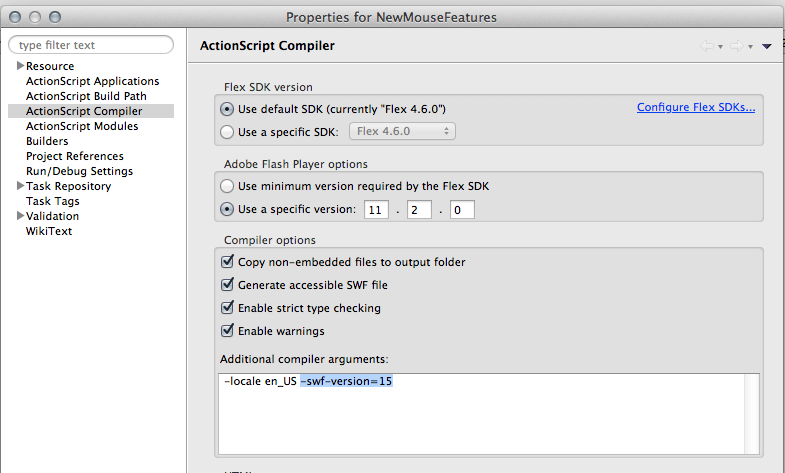
You also need to set -swf-version=15 in ActionScript compiler settings. See screenshot:
MAX Racer Remote Device Controller in AIR for Android
November 25th, 2010
Quick heads-up my friends. When we first demoed MAX Racer, we have previewed initial support for USB Steering Wheel, etc. This support is a sneak peek feature in Flash Player, not available right now.
This really needs you have one of these devices at home. So we were thinking about more lightweight way of controlling the game and device or mobile phone is ideal for this.
I’ve built a little app in Flex Mobile “Hero” for AIR for Android, that controls the game by sending accelerometer, speed info, brake and so on using local P2P connection over WIFI.
Check the video how it works:
Read the rest of this entry »
P2P Gaming Libs from my MAX 2010 session
November 24th, 2010
Update 3/18/2011: Source-code is available here: https://github.com/tomkrcha/RealtimeGameLib
Update 11/28/2010: Library now accepts variable group name, so you can create more instances. Download updated library below. Example: var game:P2PGame = new P2PGame(serverAddress,groupName);
Lot of you guys are asking for libs I’ve used in my Adobe MAX 2010 session Building P2P Multiplayer Games.
It’s still work in progress, but you can basically grab SWC libraries here with example.
I don’t want to publish source now as it needs several changes, refactor, comments, etc. But source-code should be available soon ![]()
This library has been used for MAX Racer without no change. So it’s kickass tested stuff! But not completely finished and documented yet. So this is the disclaimer, I do not provide any guarantees.
If you want to start playing with it, go ahead. Comments are highly welcome!
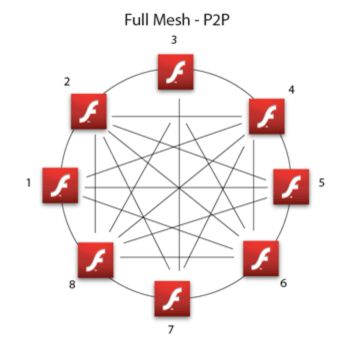
This engines creates a full mesh network via DIRECT_CONNECTIONS NetStreams among all connected users. Thanks to that, you get lowest latency possible and it’s highly suitable for realtime gaming.

